MAÏA - User Manual
Thanks again for trusting MAIASAURA !
You have just received your MAÏA, here is how it works :
1. Your Maiasaura package
2. Instructions for use
3. Autonomy - Standby mode
5. Add your own tracks
6. Personalize your Maiasaura card
7. Other questions
1. Your Maiasaura package

There are two packages in your parcel :
- A 1st package that contains :
- Your MAÏA
- Small MAÏA bag
- USB cable for charging
- A 2nd mini-package inside the first one which contains :
- The Maiasaura microSD card with 50 tracks included: Stories, Nursery Rhymes, Lullabies
- 1 USB adapter that allows you to read the microSD card on PC or MAC
2. Instructions for use

-
(1) The 4 MAÏA buttons
- (2) Maiasaura microSD card that includes 50 tracks: Nursery rhymes, Stories, Lullabies
- (3) USB charging cable
- (4) MicroSD card to USB adapter if you need to edit the content of your Maiasaura card from your PC or MAC :
- Add new Maiasaura tracks to your card
- Create your child's playlist
- Remove a track if needed
- Add your own mp3 tracks to your card
- Add stories from MOM or DAD: Record your voice with your phone and copy the mp3 file to the Maiasaura card
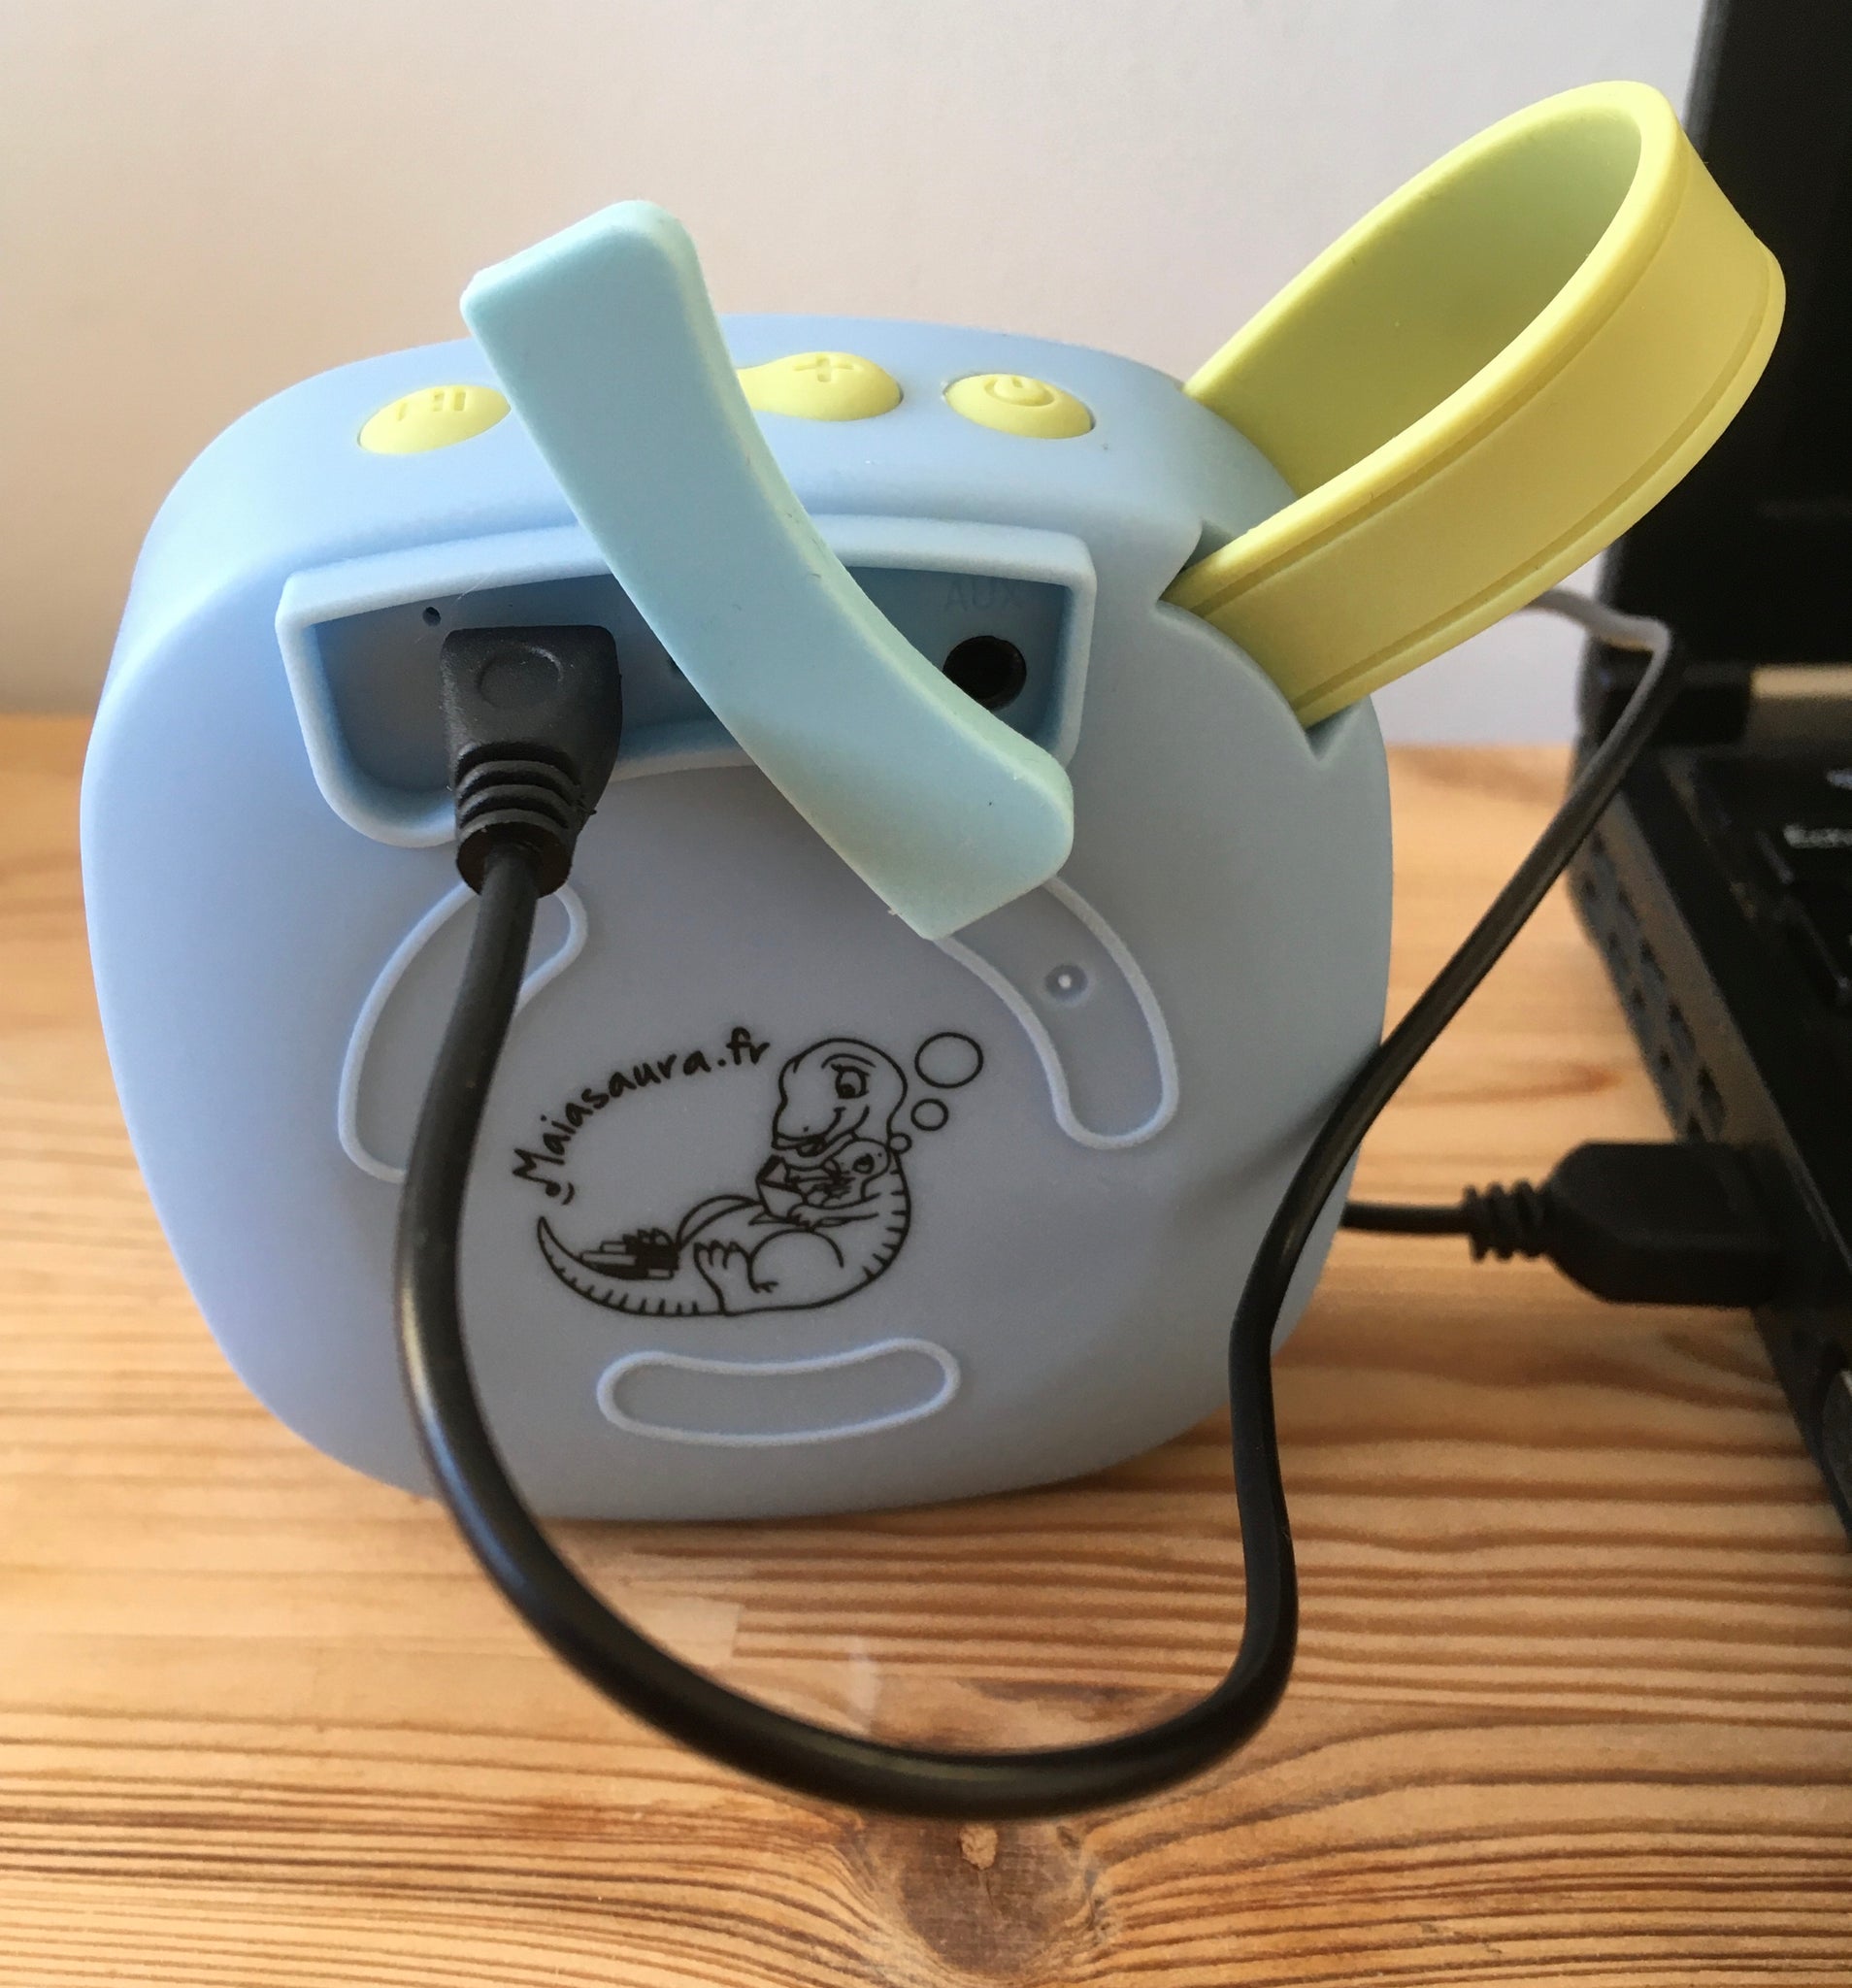
- (5) Headset Jack plug : To listen to MAIA in public places if needed
- (6) Maiasaura microSD card slot. Pull out or insert the card by pressing lightly on the card towards the inside
- (7) USB charging slot: 60 minutes charging time for 6 hours of autonomy
2.1 Turning on and off
To turn MAÏA on or off, simply press the ON button for 3 seconds :
![]()
2.2 Changing the volume
To change the volume, simply hold down the "Plus" or "Minus" button for 3 seconds :
![]()
2.3 Changing the track
To advance to the next track or return to the previous one, just press the "Plus" or "Minus" button once :
![]()
2.4 Pause / Play
To pause or resume playback of a song, simply press the Pause/Play button once :
![]()
2.5 Changing directories
To change directories: Nursery Rhymes, Stories, Lullabies, Parent mp3s, Your Playlist... just press the ON button once :
![]()
3. Autonomy - Standby mode
3.1 Autonomy
MAÏA has a battery life of 6 hours!
60 minutes of charging gives you 6 hours of battery life when MAÏA is adjusted at a normal volume.
The battery is consumed more quickly if the volume is set to maximum.
3.2 Standby modes
2 standby modes are programmed to optimize MAÏA’s battery life. MAÏA switches off automatically :
- After 15 minutes in Pause mode.
- After 1 hour in Play mode.
5. Add your own tracks
MAÏA is a speaker that allows you to add your own mp3 tracks.
5.1 Supported file
The format of the files added to the Maiasaura card must be .mp3
5.2 Supported SD cards
5.3 Reading the MAIASAURA card
Use the small USB drive adapter included with your MAÏA to insert the Maiasaura microSD card into the USB port on your PC or MAC.
Image 1: Inserting the Maiasaura microSD card into a PC's USB port

Image 2: Inserting the Maiasaura microSD card into the USB port of a MAC

5.4 Copying your own files to the Maiasaura card
a. Copy your own .mp3 files from your PC or MAC

b. Paste your files on the MAIASAURA card, in the "MP3 Parents" folder

c. When you have finished copying, eject the Maiasaura card before removing it manually.

d. Reinsert the Maiasaura card into your MAÏA.


Now you can listen to your own songs !
6. Personalize your Maiasaura card

6.1 Creating a new folder/directory
To add your own mp3s, you can create new folders in the MP3 Parents folder.
.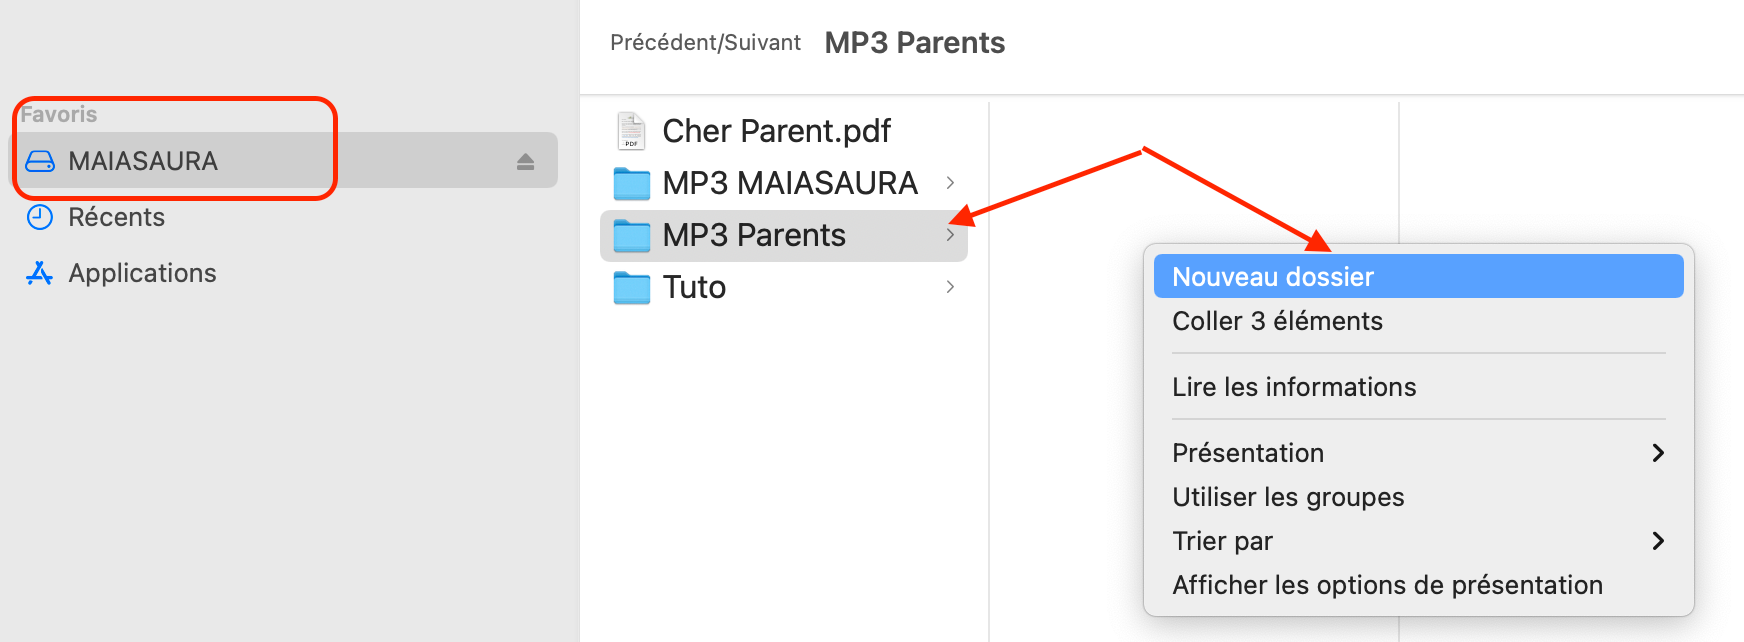
In this example, 3 new folders have been created.

Then you can add your own mp3 files in each folder.
Organizing your files by folders allows your child to easily change directories without having to browse through all the added mp3s.
To change the directory, your child only needs to press the ON button once :

6.2 Creating your child's playlist
To create a Playlist, simply create a "Playlist" folder anywhere on your Maiasaura card and then add your child's favorite songs.
3 "My Playlist" folders are already created by default under each of the 3 directories: Nursery Rhymes, Stories, Lullabie
To create a Nursery Rhymes Playlist, simply drag and drop your child's favorite nursery rhymes into the "0.My Playlist" folder

To create a Stories Playlist, simply drag and drop your child's favorite stories to the "0.My Playlist" folder

To create a Lullabies Playlist, simply drag and drop your child's favorite lullabies to the "0.My Playlist" folder.

6.3 Customize the playback order of the tracks
MAÏA plays the tracks in each directory according to when they were added to the card.
To personalize the playback order of a directory
1. Create a "MAÏA Backup" folder on your PC or Mac.
2. Cut and paste all the mp3 files from the Maiasaura card to the "MAÏA Backup" folder.
3. Copy and paste the mp3 files one by one from the "MAÏA Backup" folder back to the Maiasaura card in the desired playback order.
4. Eject the Maiasaura card, insert it back into your MAÏA and check that the playback is the order you have made.
6.4 Disable a track on the card if necessary
If you want to disable a particular Maiasaura track for any reason, just rename the extension (the last 3 characters after the dot) of the mp3 file to mp0.

After this change, the mp0 title will be automatically ignored by your MAÏA.
If you want to make this track available again for your child later, just rename its extension to .mp3
6.4 Permanently delete a file from the Maiasaura card
When you delete a file from the Maiasaura card, it is not permanently deleted. This security measure prevents files from being inadvertently deleted. Any file deleted from the card is automatically moved to a hidden folder called: .Trashes
To display this folder, you just need to enable the hidden files and folders on your PC/MAC.
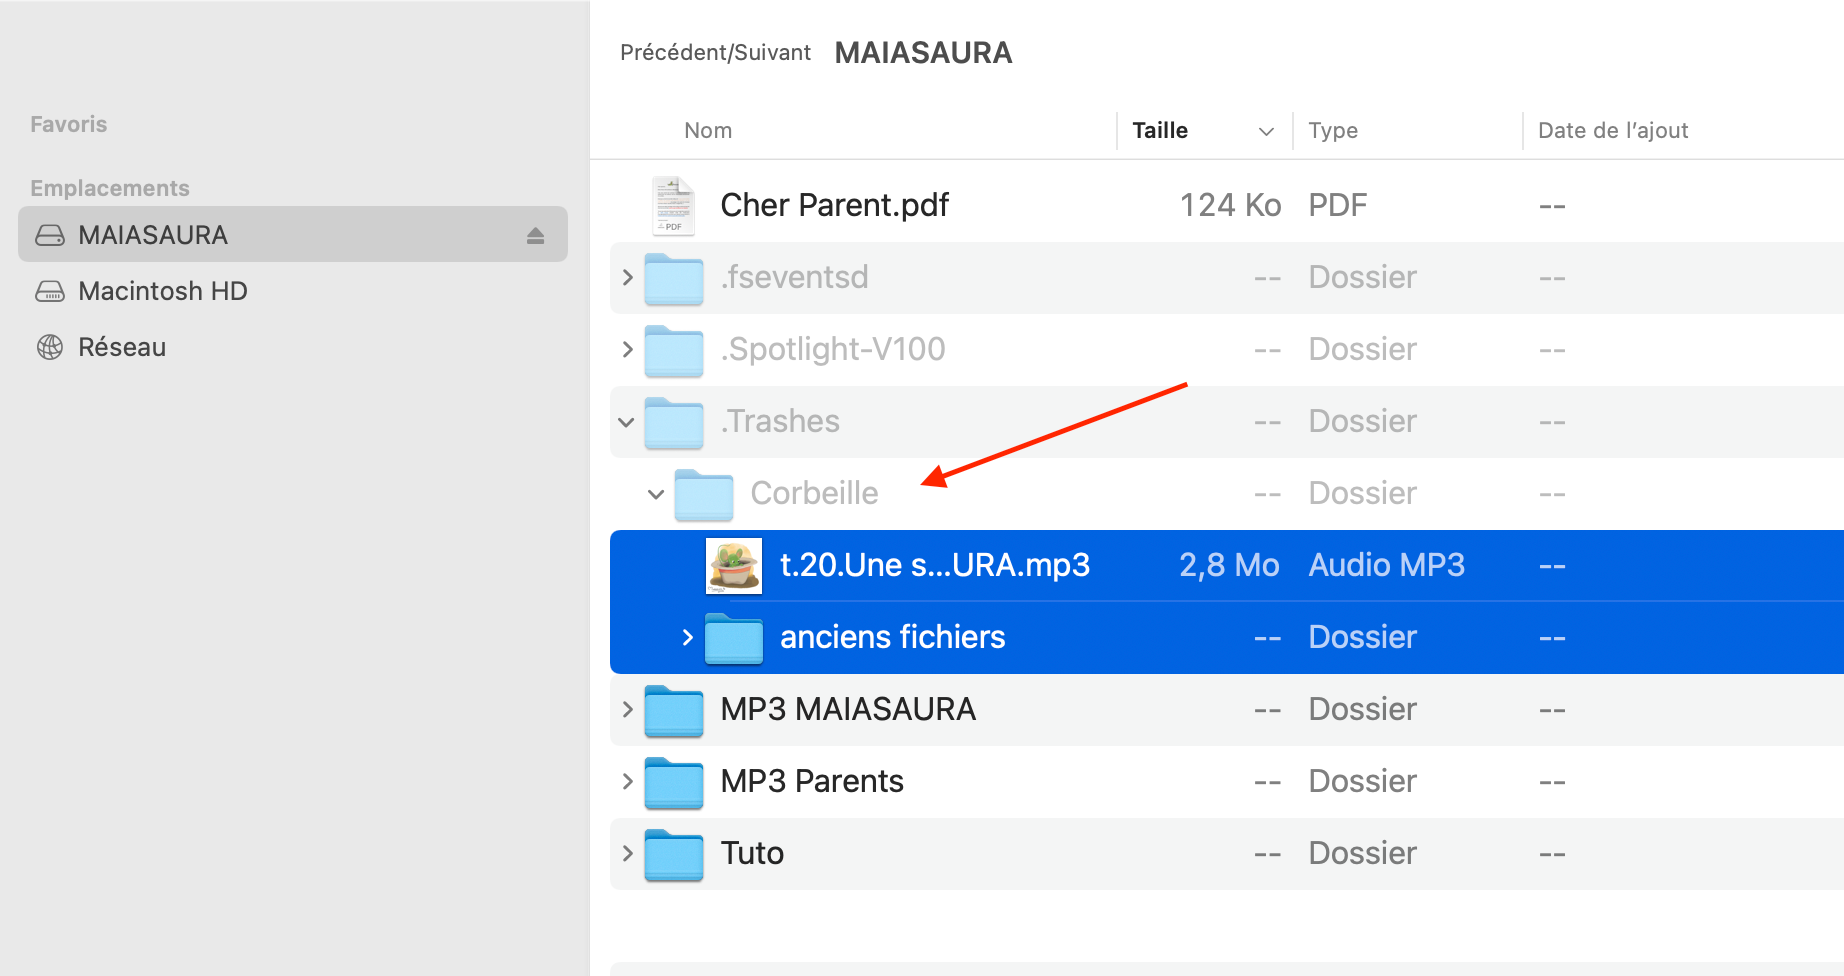
Then you will be able to permanently delete the files that are under the .Trashes folder by a simple Cut and Paste from the card to the Desktop of your PC/MAC.
7. Other questions ?
For any other technical questions, you can contact us here : https://maiasaura.life/help
We will get back to you within 24 hours!
Do you have a suggestion or an idea on how we can improve?
Do not hesitate to write to us here: https://maiasaura.life/reviews
Happy listening!

Amicalement MAIASAURA